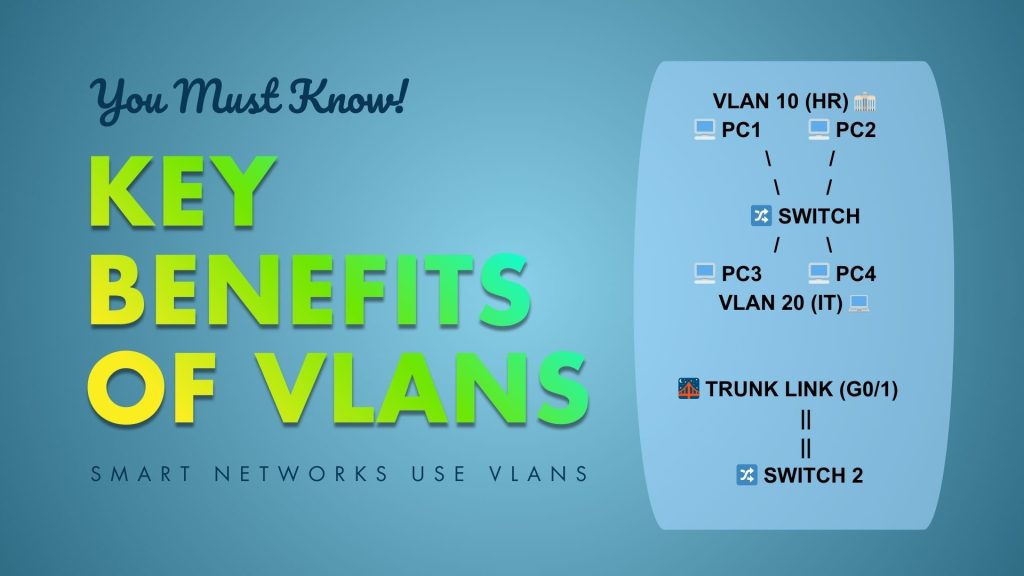
Improved Security – Users from different departments (e.g., HR and Finance) can be placed in different VLANs to prevent unnecessary communication.
Better Performance – Reduces the size of broadcast domains, which minimises unnecessary traffic.
Flexibility – Users can be grouped by function rather than physical location.
Scalability – Easy to expand networks without major physical changes.
VLAN Configuration Basics
Before diving into commands, let’s understand the basic elements of VLAN configuration:
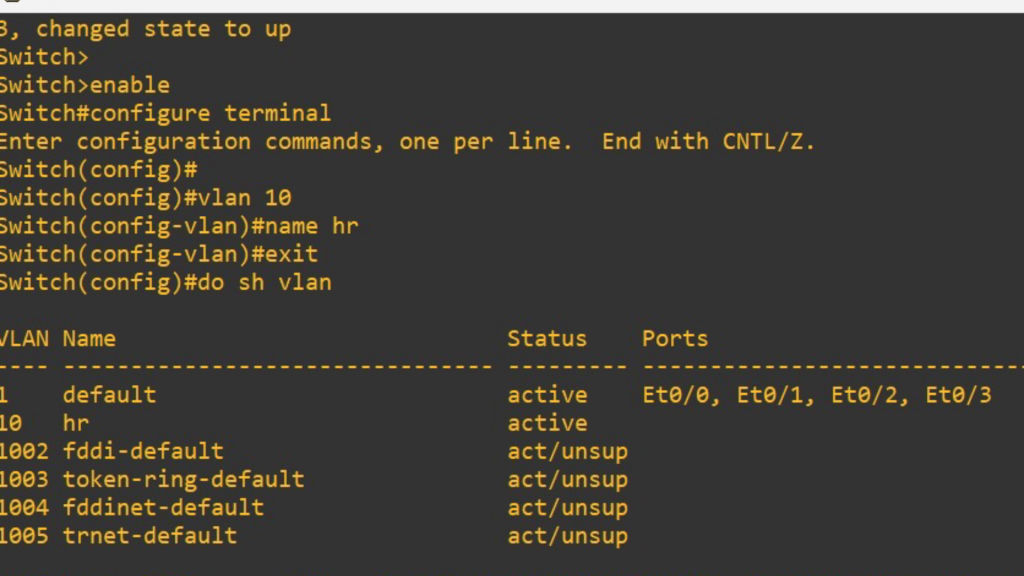
1. VLAN creation – Defining VLAN IDs and names on the switch.
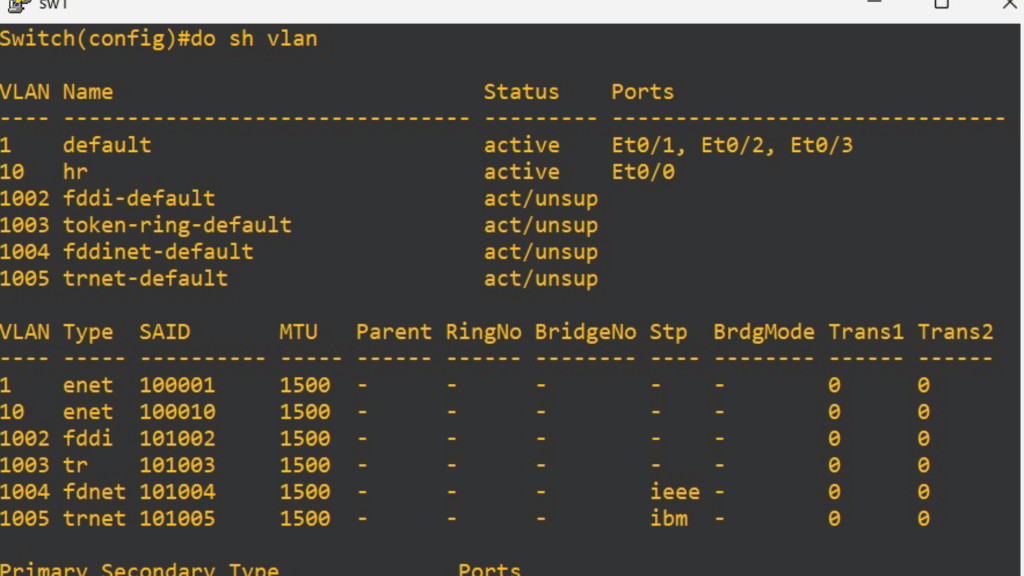
2. Assigning ports to VLANs – Telling the switch which interfaces belong to which VLAN.
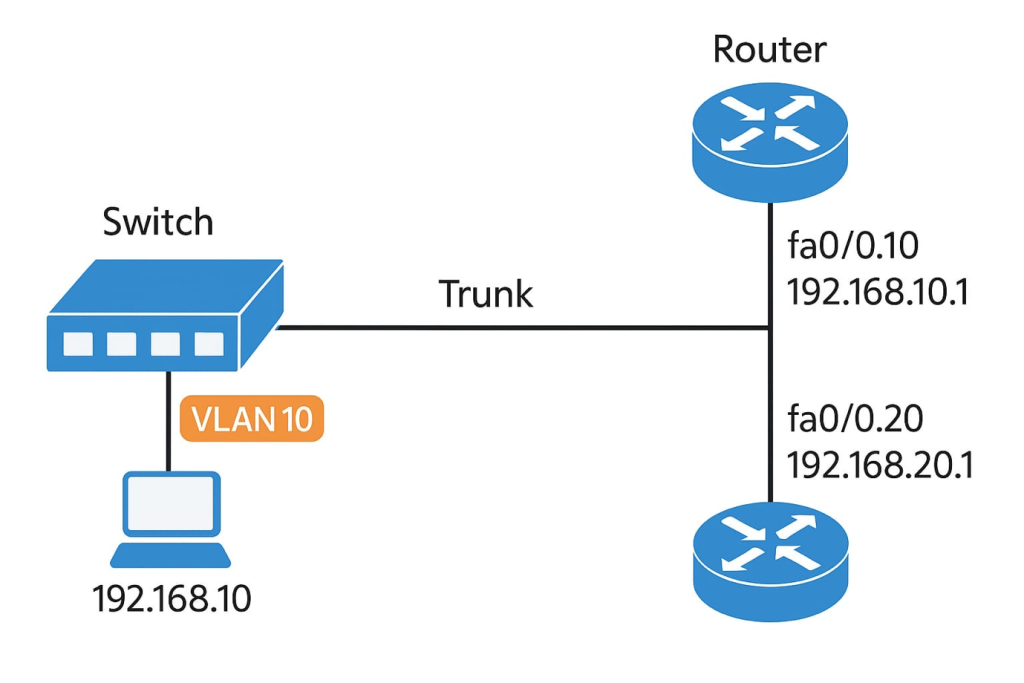
3. Trunking – Allowing multiple VLANs to traverse a single link between switches.
4. Inter-VLAN Routing – Using a router or Layer 3 switch to allow communication between VLANs.
VLAN Commands in Cisco IOS
Now, let’s go step by step through the most important VLAN-related commands, starting with VLAN creation and moving toward trunking and verification.
1. Creating a VLAN
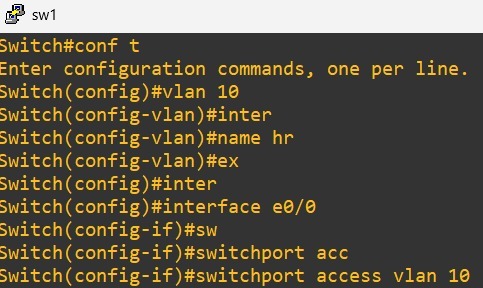
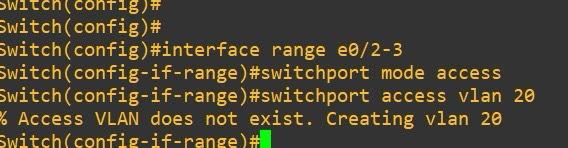
2. Assigning Ports to VLANs
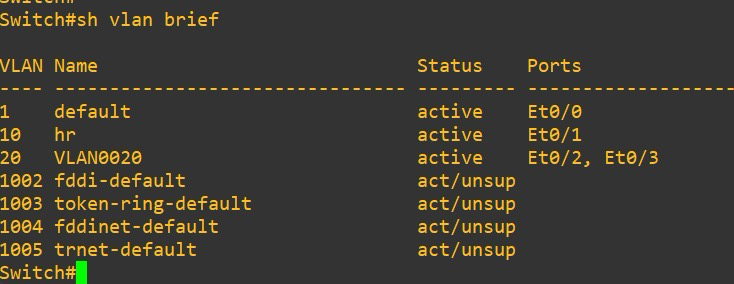
3. Displaying VLAN Information
To check VLANs created on a switch:
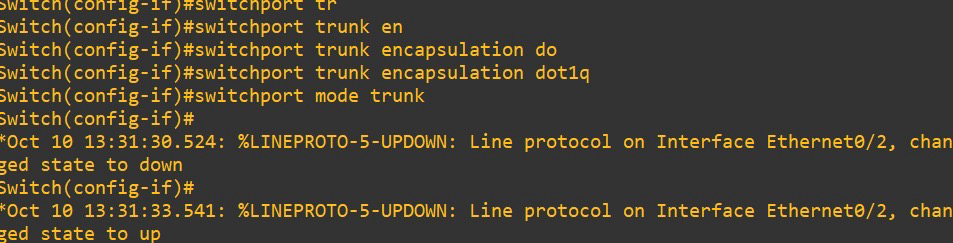
4. Configuring Trunk Ports
Trunk ports carry traffic from multiple VLANs between switches or between a switch and a router.
5. Deleting a VLAN
If you want to remove a VLAN:

6. Verifying VLAN Configurations
Some important verification commands include:
Switch# show interfaces trunk
Switch# show running-config
Switch# ping <IP-address>
show vlan brief → Displays VLANs and their ports.
show interfaces trunk → Confirms trunk ports and allowed VLANs.
ping → Tests connectivity across VLANs after routing is configured.
VLAN Troubleshooting Commands
Even the best network setups face issues. Common troubleshooting commands include:
Check VLAN assignment
Check port status
Switch# show interface fa0/1 switchport
Check trunk configuration
Switch# show interfaces trunk
Verify VLAN database
Switch# dir flash:
Clear VLANs if misconfigured
Switch# delete flash:vlan.dat
Best Practices for VLAN Configuration
1. Use a dedicated VLAN for management (e.g., VLAN 99).
2. Avoid using VLAN 1 for security reasons.
3. Restrict VLANs on trunks instead of allowing all by default.
4. Document VLAN IDs and names for clarity.
5. Regularly verify VLAN database to ensure no unwanted VLANs exist.
Conclusion
VLANs are the backbone of modern LAN segmentation. They make networks more secure, manageable, and scalable. However, their power lies not just in understanding what a VLAN is, but in mastering the commands used to configure, verify, and troubleshoot them.
From creating VLANs and assigning ports to configuring trunks and enabling inter-VLAN routing, the commands discussed above form the foundation of VLAN administration on Cisco devices. For aspiring network engineers, practicing these commands in a lab or simulator (like Cisco Packet Tracer or GNS3) is essential.
By following the structured approach in this article, you’ll not only grasp the theoretical concepts of VLANs but also be able to confidently execute and verify VLAN configurations in real-world scenarios.
Recommended visit-